Hi
again!
So
I’m going to be giving you the low down on things you will need to take
incredible photos. I’m not really a great photographer but I know enough to be
able to give you pointers on what you need and different techniques.
Equipment

Also
depending on the type of photography you are wanting to do, you should have a
dark room or studio. My school literally had a deep cupboard with a table and a
couple of chairs and lights. If you want to do portraiture, then a room like
this would be useful. Make sure it’s an area with nothing on the walls, as that
is picked up in the picture when using the lights in the room or even torch
lights or other things like that.

You
may also need a light box. This allows you to take still life images like this
one, (I didn’t want to use my own photo here because they’re not great but I’m
going to have to.) This wasn’t a great light box, you can actually make your
own, and the best thing to do to find a tutorial is Google ‘Light box tutorial’
because they can be expensive.
 If
you plan on doing portraiture, you will need a white background for them,
especially for low light photos. Something for low light photos you will need
is a light, you can use a lamp, but the best thing would be one of these, I’m
not sure what they are called but I’m sure if you search ‘photographer lights
for sale’ you should see some on amazon or something. We used these at school, but now I just use a lamp, it’s cheaper
and easier.
If
you plan on doing portraiture, you will need a white background for them,
especially for low light photos. Something for low light photos you will need
is a light, you can use a lamp, but the best thing would be one of these, I’m
not sure what they are called but I’m sure if you search ‘photographer lights
for sale’ you should see some on amazon or something. We used these at school, but now I just use a lamp, it’s cheaper
and easier.  One
absolute essential no matter what type of photography you are doing is a
tripod. It’s a must have for a photographer. It basically keeps your camera
still and you can level out a landscape by using one. If you’re stood on a hill
you can make two legs of the tripod longer and level out the camera to make it
easier to take the photo. Tripods are a godsend, make sure you have one. That’s all the equipment I've ever used.
One
absolute essential no matter what type of photography you are doing is a
tripod. It’s a must have for a photographer. It basically keeps your camera
still and you can level out a landscape by using one. If you’re stood on a hill
you can make two legs of the tripod longer and level out the camera to make it
easier to take the photo. Tripods are a godsend, make sure you have one. That’s all the equipment I've ever used.
Techniques
Rule Of Thirds
 The rule of thirds is literally a three by three
grid on your camera which allows you to position your photo to m
The rule of thirds is literally a three by three
grid on your camera which allows you to position your photo to m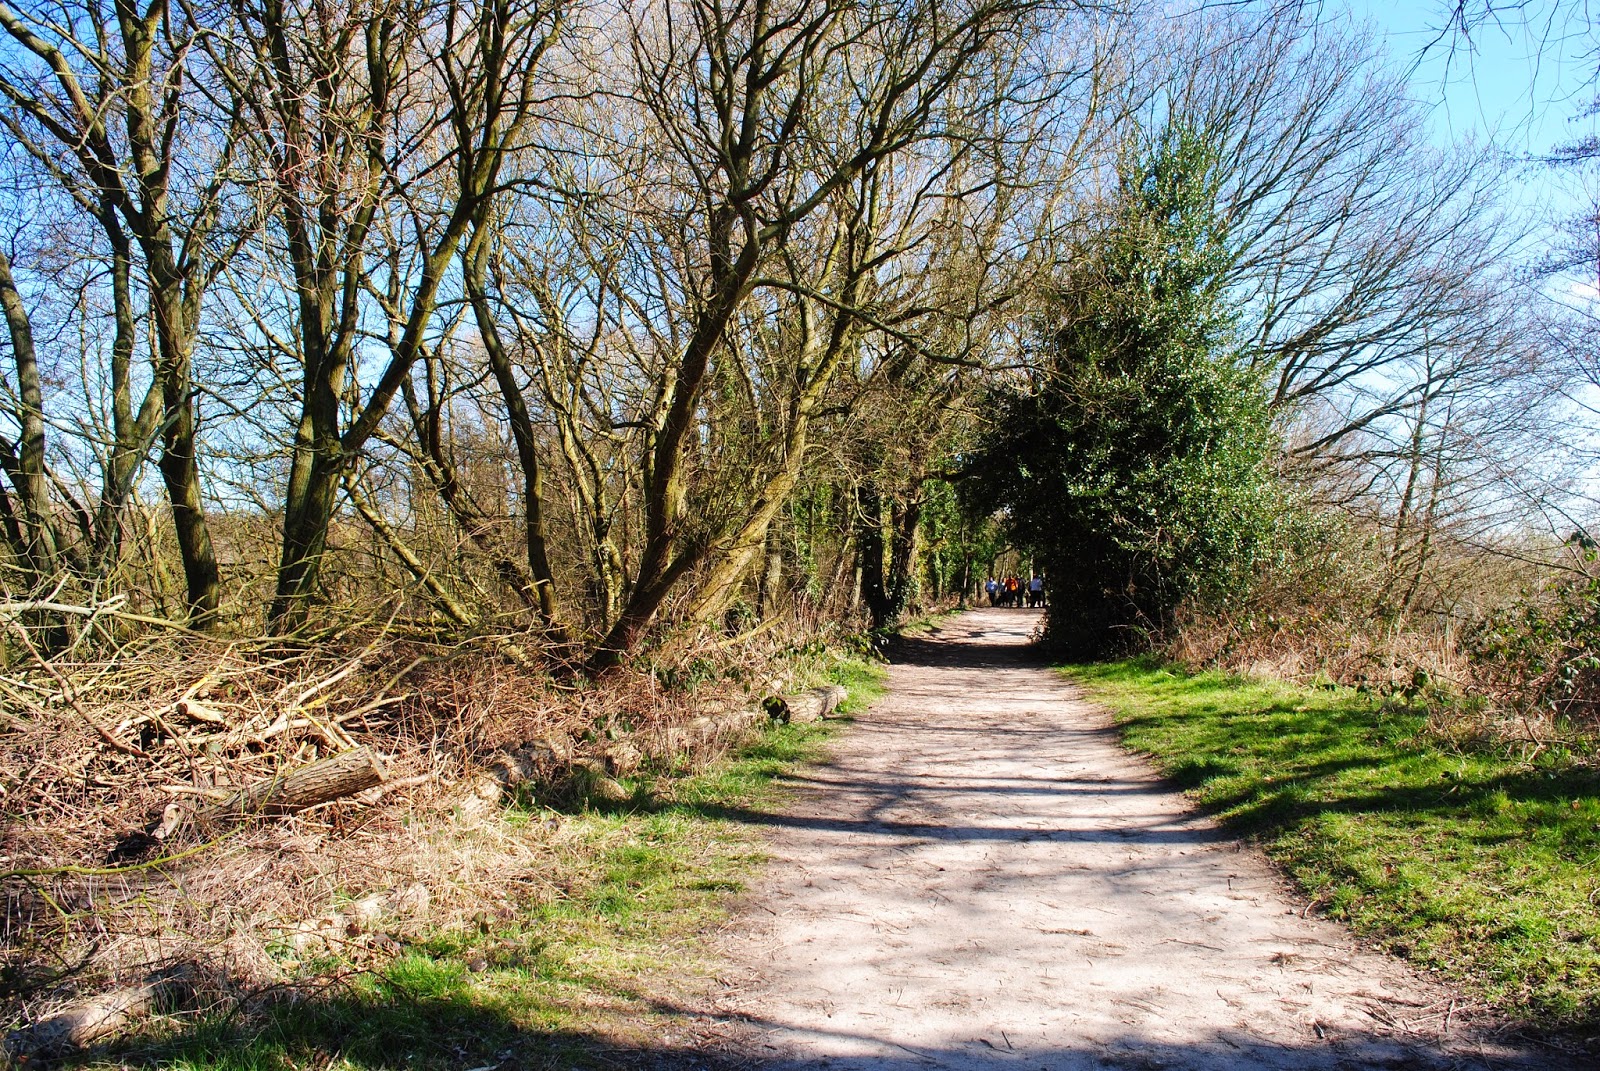 Another
way of using the rule of thirds is to get a good sky/land ratio in your photo.
If you have a photograph with an interesting sky, you want to use the top third
and the centre third of your photo on sky and the bottom on land, but if the
landscape is more interesting than the sky, then you need the top third sky and
the centre and bottom thirds land.
Another
way of using the rule of thirds is to get a good sky/land ratio in your photo.
If you have a photograph with an interesting sky, you want to use the top third
and the centre third of your photo on sky and the bottom on land, but if the
landscape is more interesting than the sky, then you need the top third sky and
the centre and bottom thirds land.
You
can find a rule of thirds grid on most cameras, there should be settings for
them and it’s all about positioning, to get a really good quality photo. The landscape
is one of my photos which uses the rule both ways, as the path is slightly positioned
to one side, and there is more land that sky. If you imagine a grid on my photo
like the one on the bee photograph, then everything becomes a bit clearer.
This
is a really easy rule that many photographers rely on and it allows you to take
some brilliant photos.
Macro

If
you get too close to the object you want to photograph your camera may not take the picture so be careful.
Shutter Speeds
 Shutter speeds
are one of the most diverse things on your DSLR camera. A shutter speed
literally changes the time you have your cameras shutter open, and it allows
more light into the lens. You can do so much. I’ll put some examples and
explain them. For any of the shutter speed photos you will absolutely need a
tripod, or it won’t work at all.
Shutter speeds
are one of the most diverse things on your DSLR camera. A shutter speed
literally changes the time you have your cameras shutter open, and it allows
more light into the lens. You can do so much. I’ll put some examples and
explain them. For any of the shutter speed photos you will absolutely need a
tripod, or it won’t work at all.
This
was taken by photography teacher while I held a small torch covered by pink
tissue paper, and walked around my subject pointing it at the floor. The camera
takes in all the light it receives, so you get this effect of the light
around the subject. This is actually called light painting because you can draw
with the light and although it will be gone to your eyes, it’s still in a
camera and looks like a painting.
 The possibilities are endless with light painting, you can do
things with a subject or free hand like the infinity sign. You can write words,
you just need to make sure you have a good positioning in your camera and as
much space as you can get.
The possibilities are endless with light painting, you can do
things with a subject or free hand like the infinity sign. You can write words,
you just need to make sure you have a good positioning in your camera and as
much space as you can get.
The best shutter speeds to use are between 5-8 seconds for
light painting.
 I’m sure you’ve all seen the photos of the car headlights on
the roads? This also uses shutter speeds! The best place for these is motorways. You need a tripod and a sturdy
surface and for it to not be too windy, because if it’s windy you will get
shaky lines. Its best if you don’t do this during rush hour as the headlights wont match up and it will have breaks and look weird. Rule of
thirds comes into play here, you definitely need more land that sky, or equal
if the sky looks great.
I’m sure you’ve all seen the photos of the car headlights on
the roads? This also uses shutter speeds! The best place for these is motorways. You need a tripod and a sturdy
surface and for it to not be too windy, because if it’s windy you will get
shaky lines. Its best if you don’t do this during rush hour as the headlights wont match up and it will have breaks and look weird. Rule of
thirds comes into play here, you definitely need more land that sky, or equal
if the sky looks great.
The more twisting the road are the more interesting the
image, but this was the best I could do in the time I had.
 This is also what happens when it goes wrong and the camera
moves. I turned to talk to my mum with the camera strap around my neck and it
spun, but it was very funny. You need about a 13-15 second shutter for these,
or you wont get the effect right and the lights wont meet up.
This is also what happens when it goes wrong and the camera
moves. I turned to talk to my mum with the camera strap around my neck and it
spun, but it was very funny. You need about a 13-15 second shutter for these,
or you wont get the effect right and the lights wont meet up.
Steel wool is very dangerous and you need to make sure you
have water near by.
For this I will do a separate blog post for but here is the outlines of
this because it uses shutter speeds and its my favourite thing ever.
 You
definitely need more than one person for this. My dad took me down to his works yard to do these and they
make brilliant effects with the sparks flying off the wool as it is spun.
You
definitely need more than one person for this. My dad took me down to his works yard to do these and they
make brilliant effects with the sparks flying off the wool as it is spun.As I said, I will do a separate post for this because it’s a little more complicated than the others.
There is only one more I can think of for shutter speeds, and
that’s using glow sticks.I was experimenting with the glow sticks and found that they don’t
actually come up on the photo unless they are directly in front of the camera
lens.
 I thought I’d share this with you guys, holding the glow stick
to the lens gives this acid burn effect which hopefully got me some good grades
because it was abstract and ‘out of the box’.
I thought I’d share this with you guys, holding the glow stick
to the lens gives this acid burn effect which hopefully got me some good grades
because it was abstract and ‘out of the box’.
This needs shutter speeds about about 5 seconds, because you’re
close to the camera and don’t want to over expose the photo.
I hope this helped! There are so many more techniques, and I
will keep doing more photography tutorials if you want them.
Until later, ciao!
Tumblr
TheSkiesTheLimit YouTube
The Consulting Sherlockians YouTube
.JPG)